FreeRadius+RestImplement route authentication#
FreeRadiusInstall#
- Install freeradius
- Manually close freeradius
- Give/etc/Freeradius directory authority Restart freeradius if there are prompts: You need to execute
- Modify the file/etc/freeradius/3.0/Users to cancel the following code comments,As a test data
- Restart freeradius (-X means debugging)
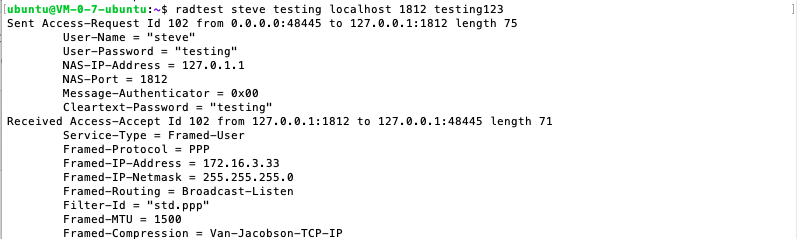
- Open a new terminal for testing,The parameters are user names、password、IP and port、key(KEY is /etc/freeradius/3.0/clients.Secret in Conf)
The client expects the results as follows
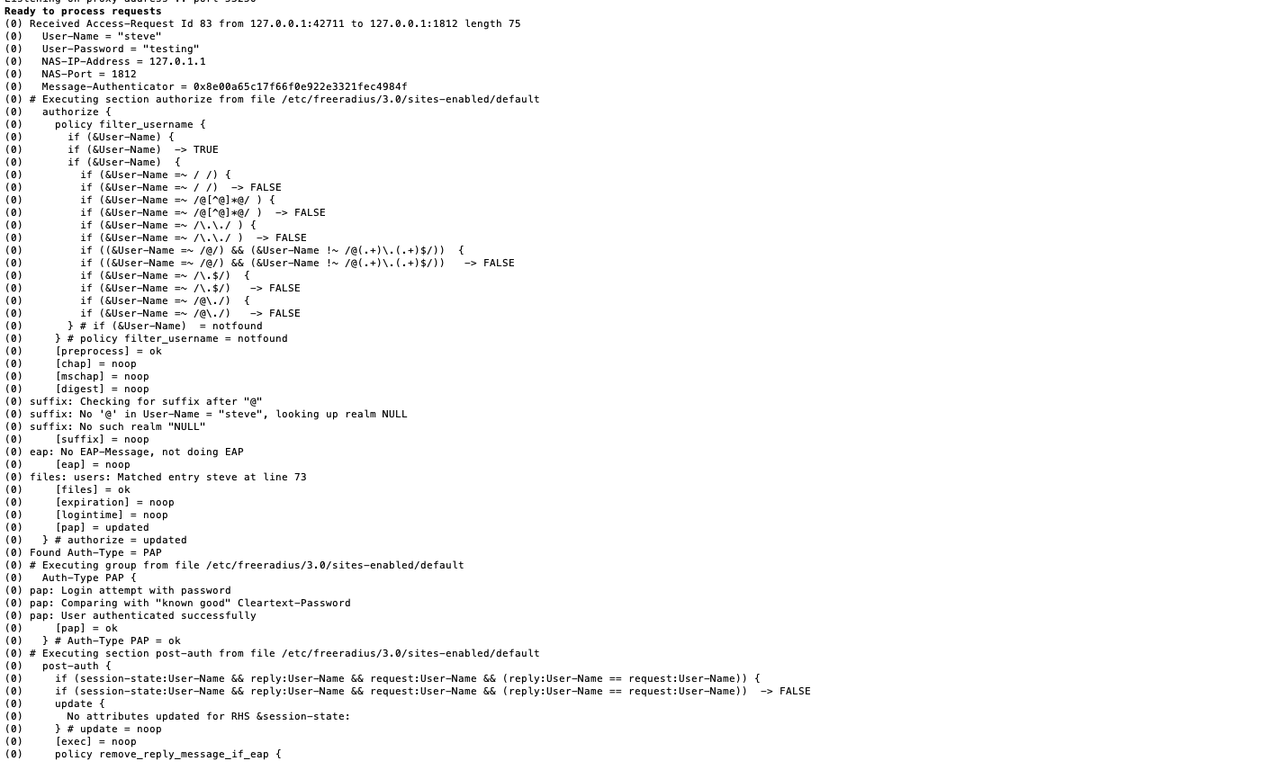
 The expected result of the server is as follows
 You can see the successful verificationAccess
From the above server output description, the following information can be obtained
The above is a Request,Then Radius is verified,Notice,The file he executes is/etc/freeradius/3.0/sites-enabled/default,Among them, the Authorize module is where he reads the authentication configuration information,You can see that here are all false,The description has failed,Then he prompts User-Name=notfound,Explain that the user name is not found,Then returned a information that was certified。
You can see the successful verificationAccess
From the above server output description, the following information can be obtained
The above is a Request,Then Radius is verified,Notice,The file he executes is/etc/freeradius/3.0/sites-enabled/default,Among them, the Authorize module is where he reads the authentication configuration information,You can see that here are all false,The description has failed,Then he prompts User-Name=notfound,Explain that the user name is not found,Then returned a information that was certified。
FreeRadiusSupport REST login#
- Open/etc/freeradius/3.0/sites-enabled/default file
- Create soft links
- exist/etc/freeradius/3.0/In users file,Configure identity verification type
- Revise/etc/freeradius/3.0/mods-available/rest
Note that the URI in the AUTHORIZE and Authenticate nodes above needs to be replaced with the login address provided by the Radius server plug -in
Note the content of the following nodes connect_uri preacct accounting post-auth pre-proxy post-proxy Edit Authorize node authorize { uri = "http://loopbing.natapp1.cc/api/v1/tenant/4da114ce-e115-44a0-823b-d372114425d0/com_longgui_app_protocol_radius_server/radius_login/?action=authorize" method = 'post' body = 'json' data = '{ "username": "%{User-Name}", "password": "%{User-Password}" }' } Edit Authenticate node authenticate { uri = "http://loopbing.natapp1.cc/api/v1/tenant/4da114ce-e115-44a0-823b-d372114425d0/com_longgui_app_protocol_radius_server/radius_login/?action=authenticate" method = 'post' body = 'json' data = '{ "username": "%{User-Name}", "password": "%{User-Password}" }' } - Open the external network connection Modify the file (/etc/freeradius/3.0/clients.conf),The iPaddr here is the client local IP At the same time, open port 1812 of the UDP protocol of the cloud server
- Start the radius service If the prompt port is occupied, you can run first
- Test login